
Brief: Packaging and Presentation
For this brief we need to think about the way to present the work. We will need to create a range of packaging, it can either be the product/artwork, it can enhance the object within it, or be the display itself.
The packaging may be protective, revealing, surprising, concealing, it may tempt or invite the viewer to engage in a physical action. BE EXPERIMENTAL.
Research various cultures and their approach to packaging, e.g. Japan, China, India.
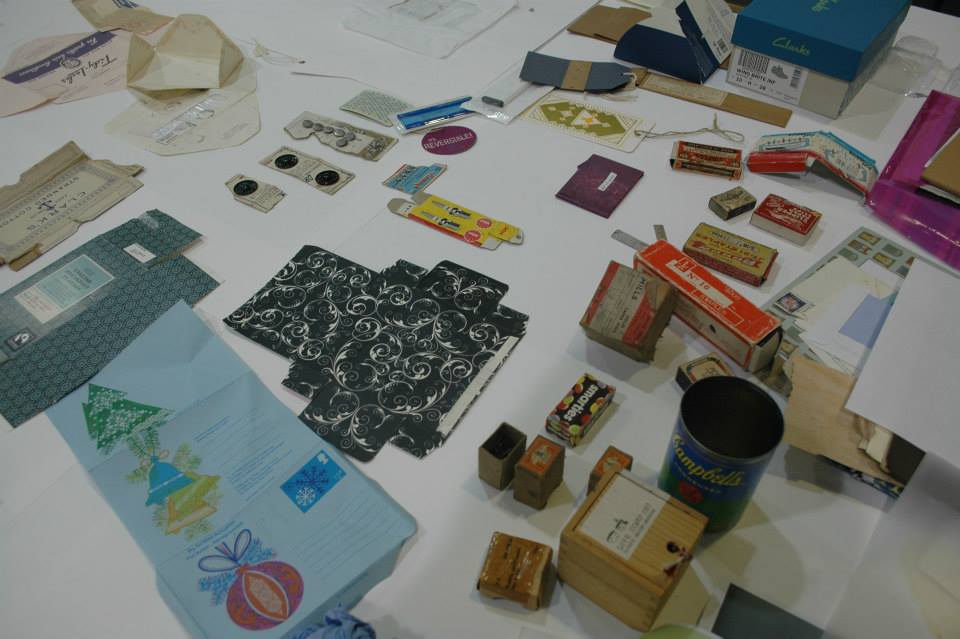
So to begin this brief, from the selection of objects that our Applied Art teacher had brought in, I chose a small stamp book. I was drawn to this object because of how fragile it was, it was a beautiful way to present stamps. I initially photocopied the book and created a rough maquette of what I wanted my final packaging to be.


From creating this maquette I found that it was much too big. I wanted to create another way of storing stamps, but mainly as a small envelope type package to hold stamps until you could take them to the larger collection or as a way to store your stamps until you actually need to use them. I wanted it to be small enough to fit inside a wallet or a purse so that it would be easy to take with you.
——————————————————————————————————————————————–

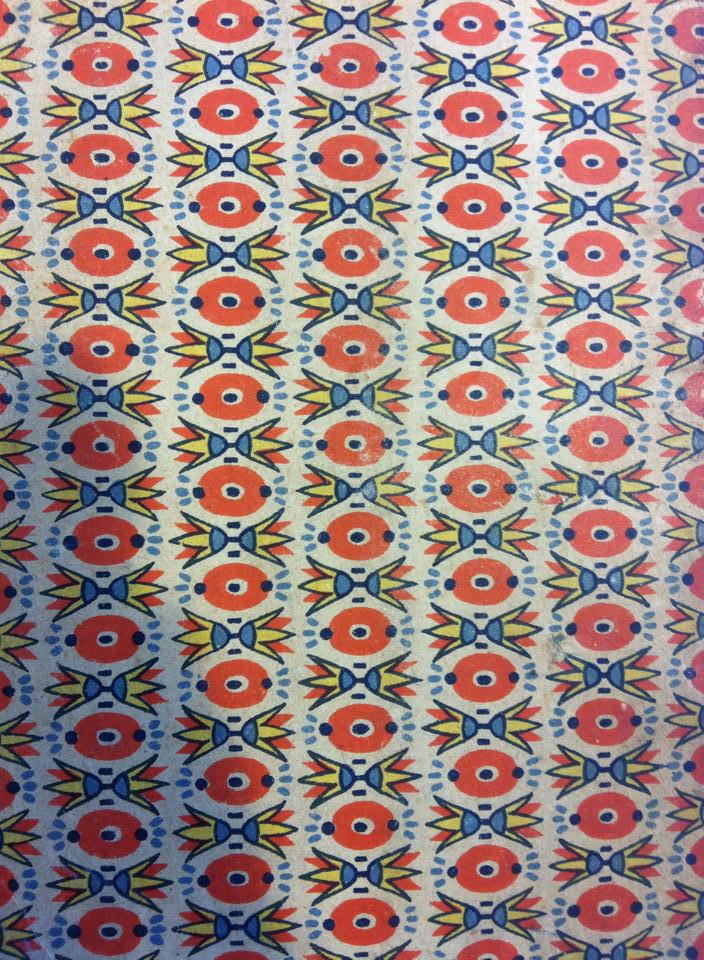
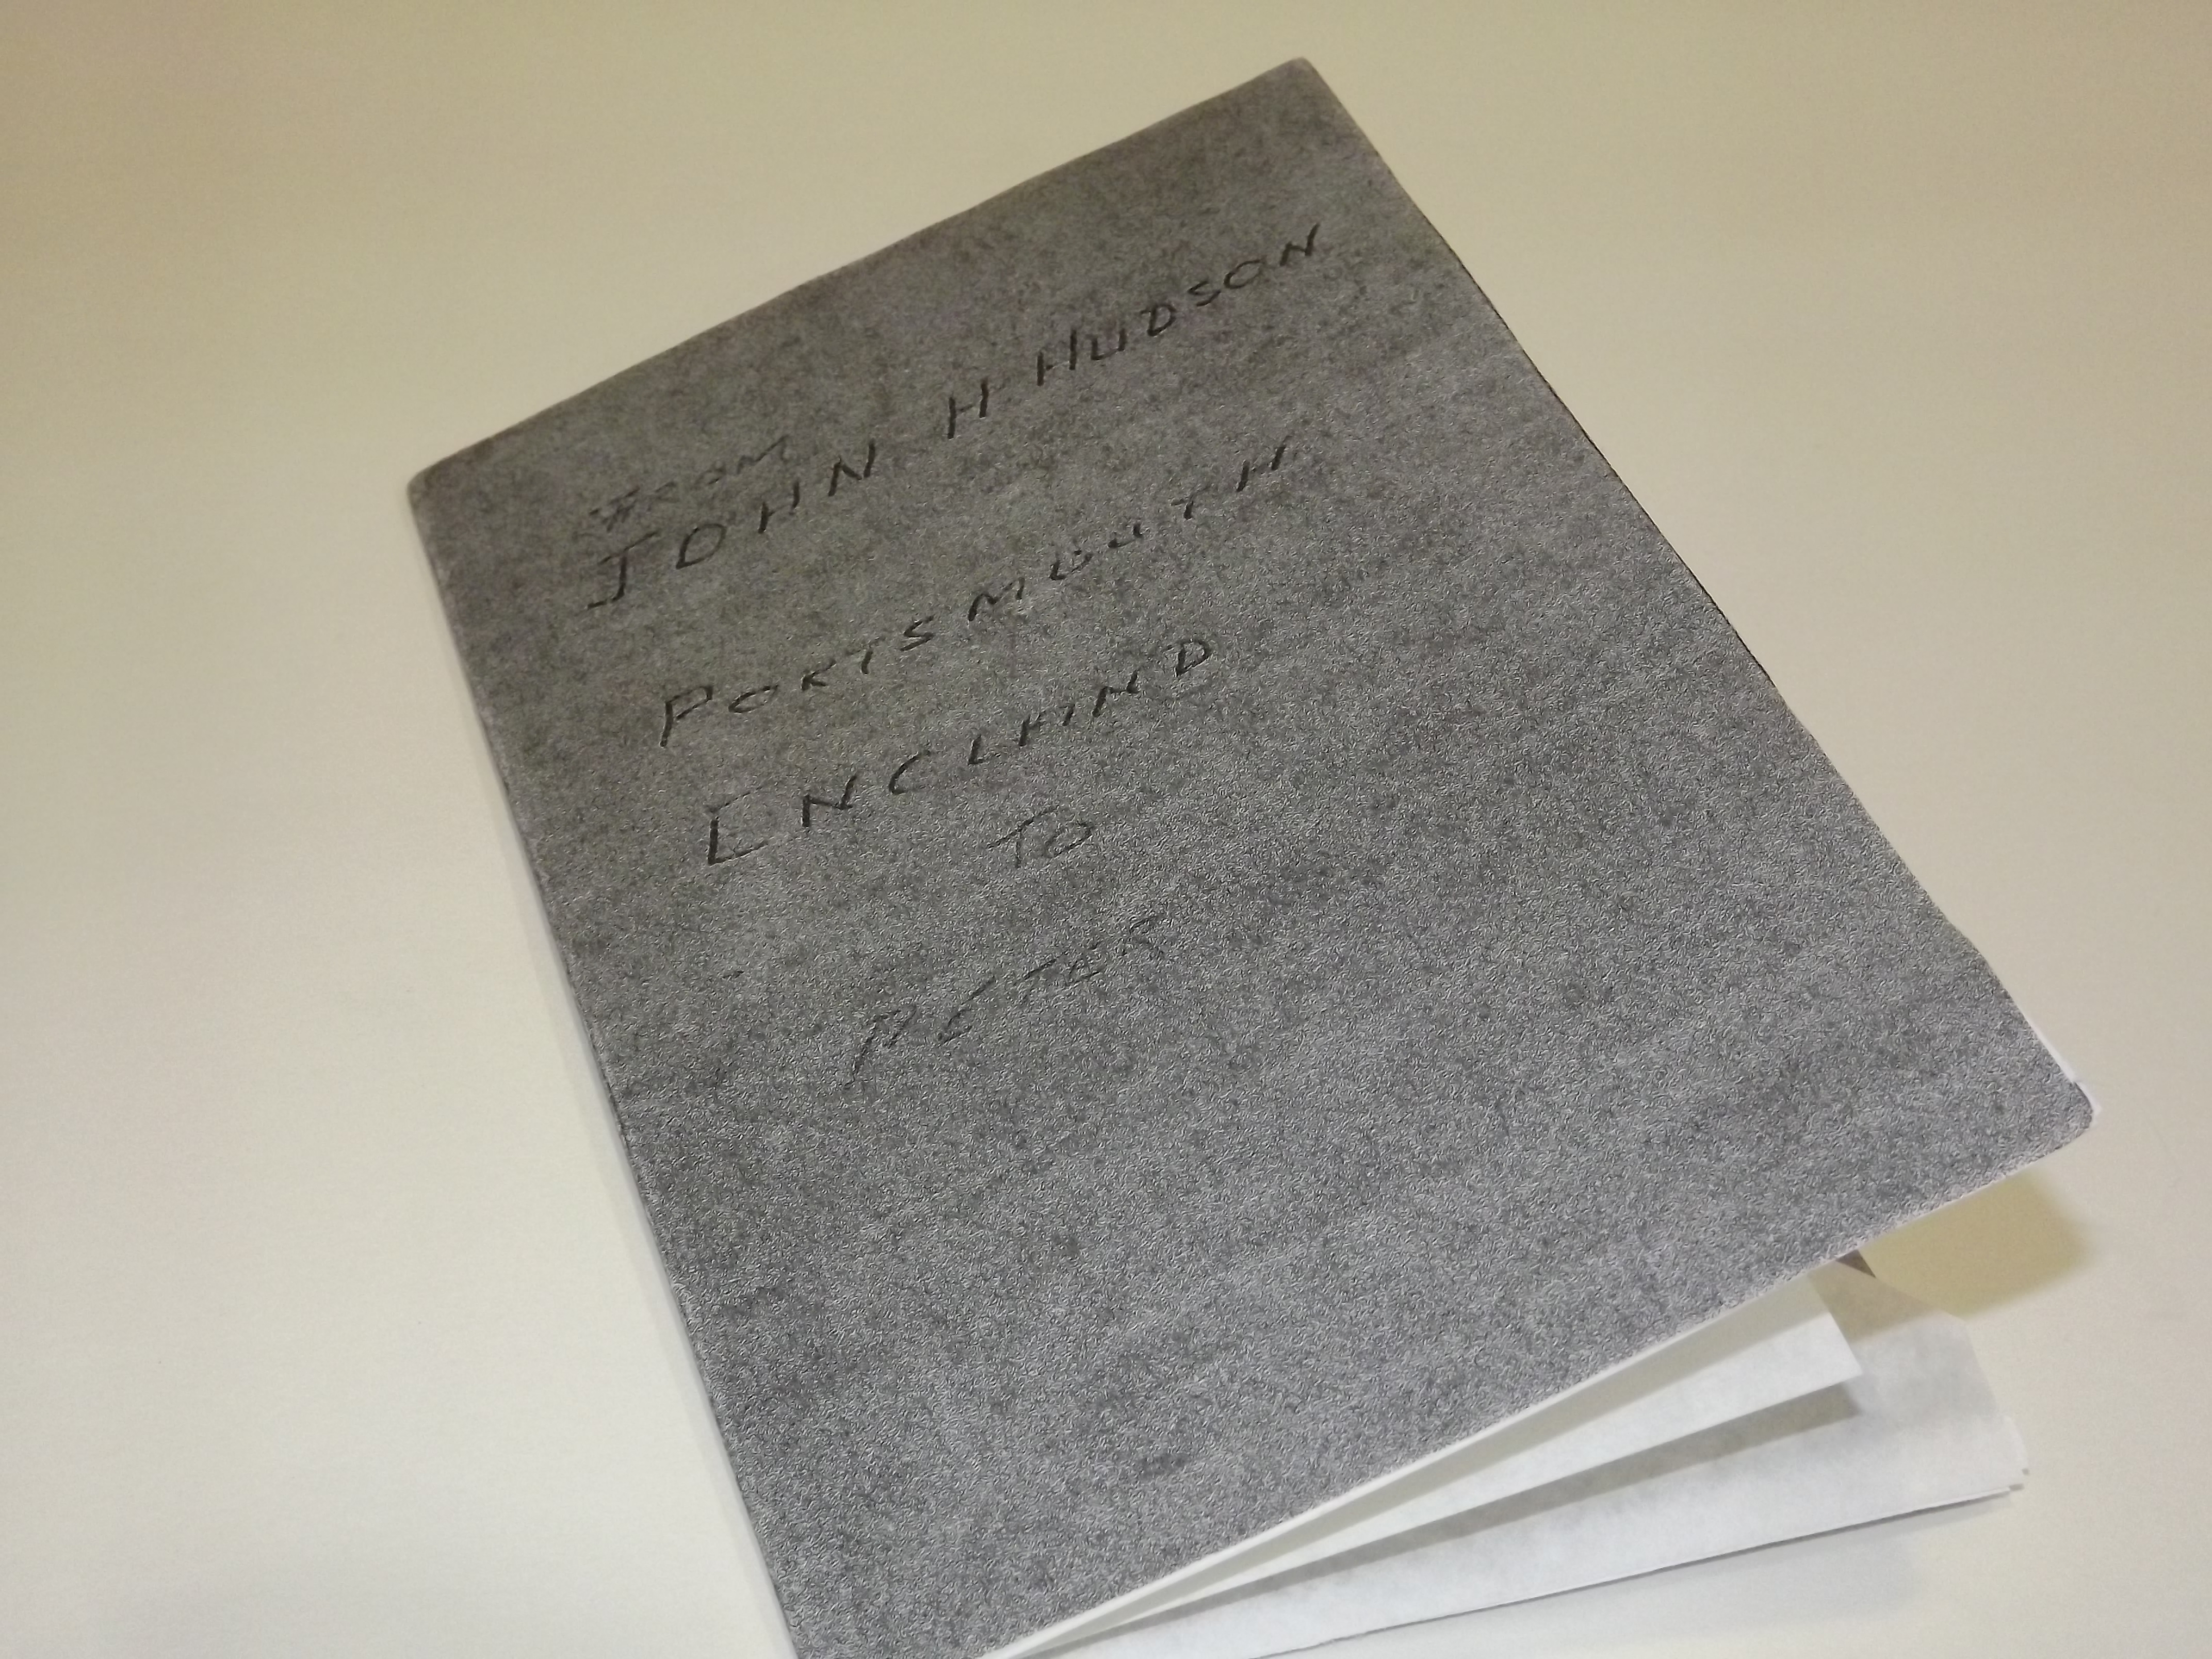
Coming away from my initial idea, I picked up a small book of poetry which had a beautiful patterned cover. The design on the cover reminded me of the pattern on a vintage wallpaper that I have, so I went looking for that when I stumbled across a small envelope that I had been keeping for a while. This then gave me an idea of creating various small envelopes with lovely messages inside as a type of ‘pick-me-up’ for random people throughout the day. I acted on this idea by tracing around the template of the small envelope that I’d found and creating a stencil of it. I then loosely collaged pages and put the stencil over the top and scanned that onto the computer.

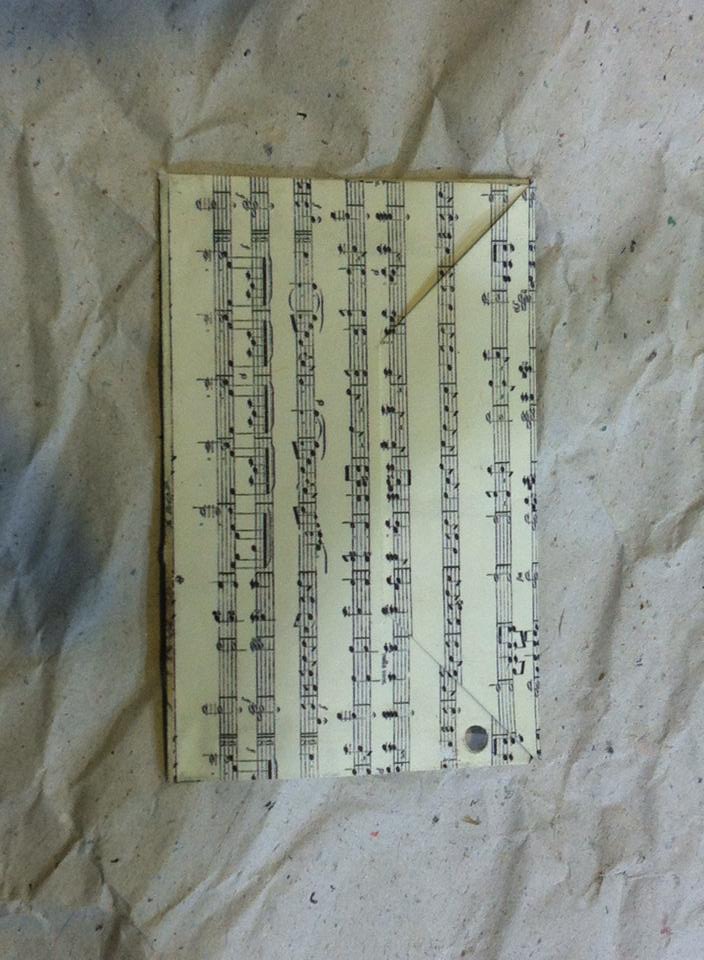

I did this approximately 20 times and printed the envelopes out two to a page. Using a scalpel I then cut around the design and glued them together. Once I had all of the envelopes completed I then went onto the computer and created templates of the sized cards to go inside the envelopes to ensure that they fitted. I then put six to a page and coloured each with colours that I’d matched to elements from the envelopes.

I then hand wrote messages onto the cards. I began quite soppily with messages like ‘you’re a beautiful person’, but then thought that they’d began to get too serious so I started writing them to be a bit more humorous, one of the cards read ‘I hope one day you get your unicorn, you deserve it!’. I liked this one because I found it quite funny, and I thought that if someone was to randomly find it, then it would make them laugh which would make them feel good. I really enjoyed making the envelopes and writing the messages because I want to create a video of people either finding the envelopes in random places, or having a plinth with the envelopes on them and having people walk up to it out of curiosity and take an envelope and record their reaction.


front, back, opened. The message inside: “everything will be alright in the end, if it’s not okay, then it’s not the end.”
——————————————————————————————————————————————–


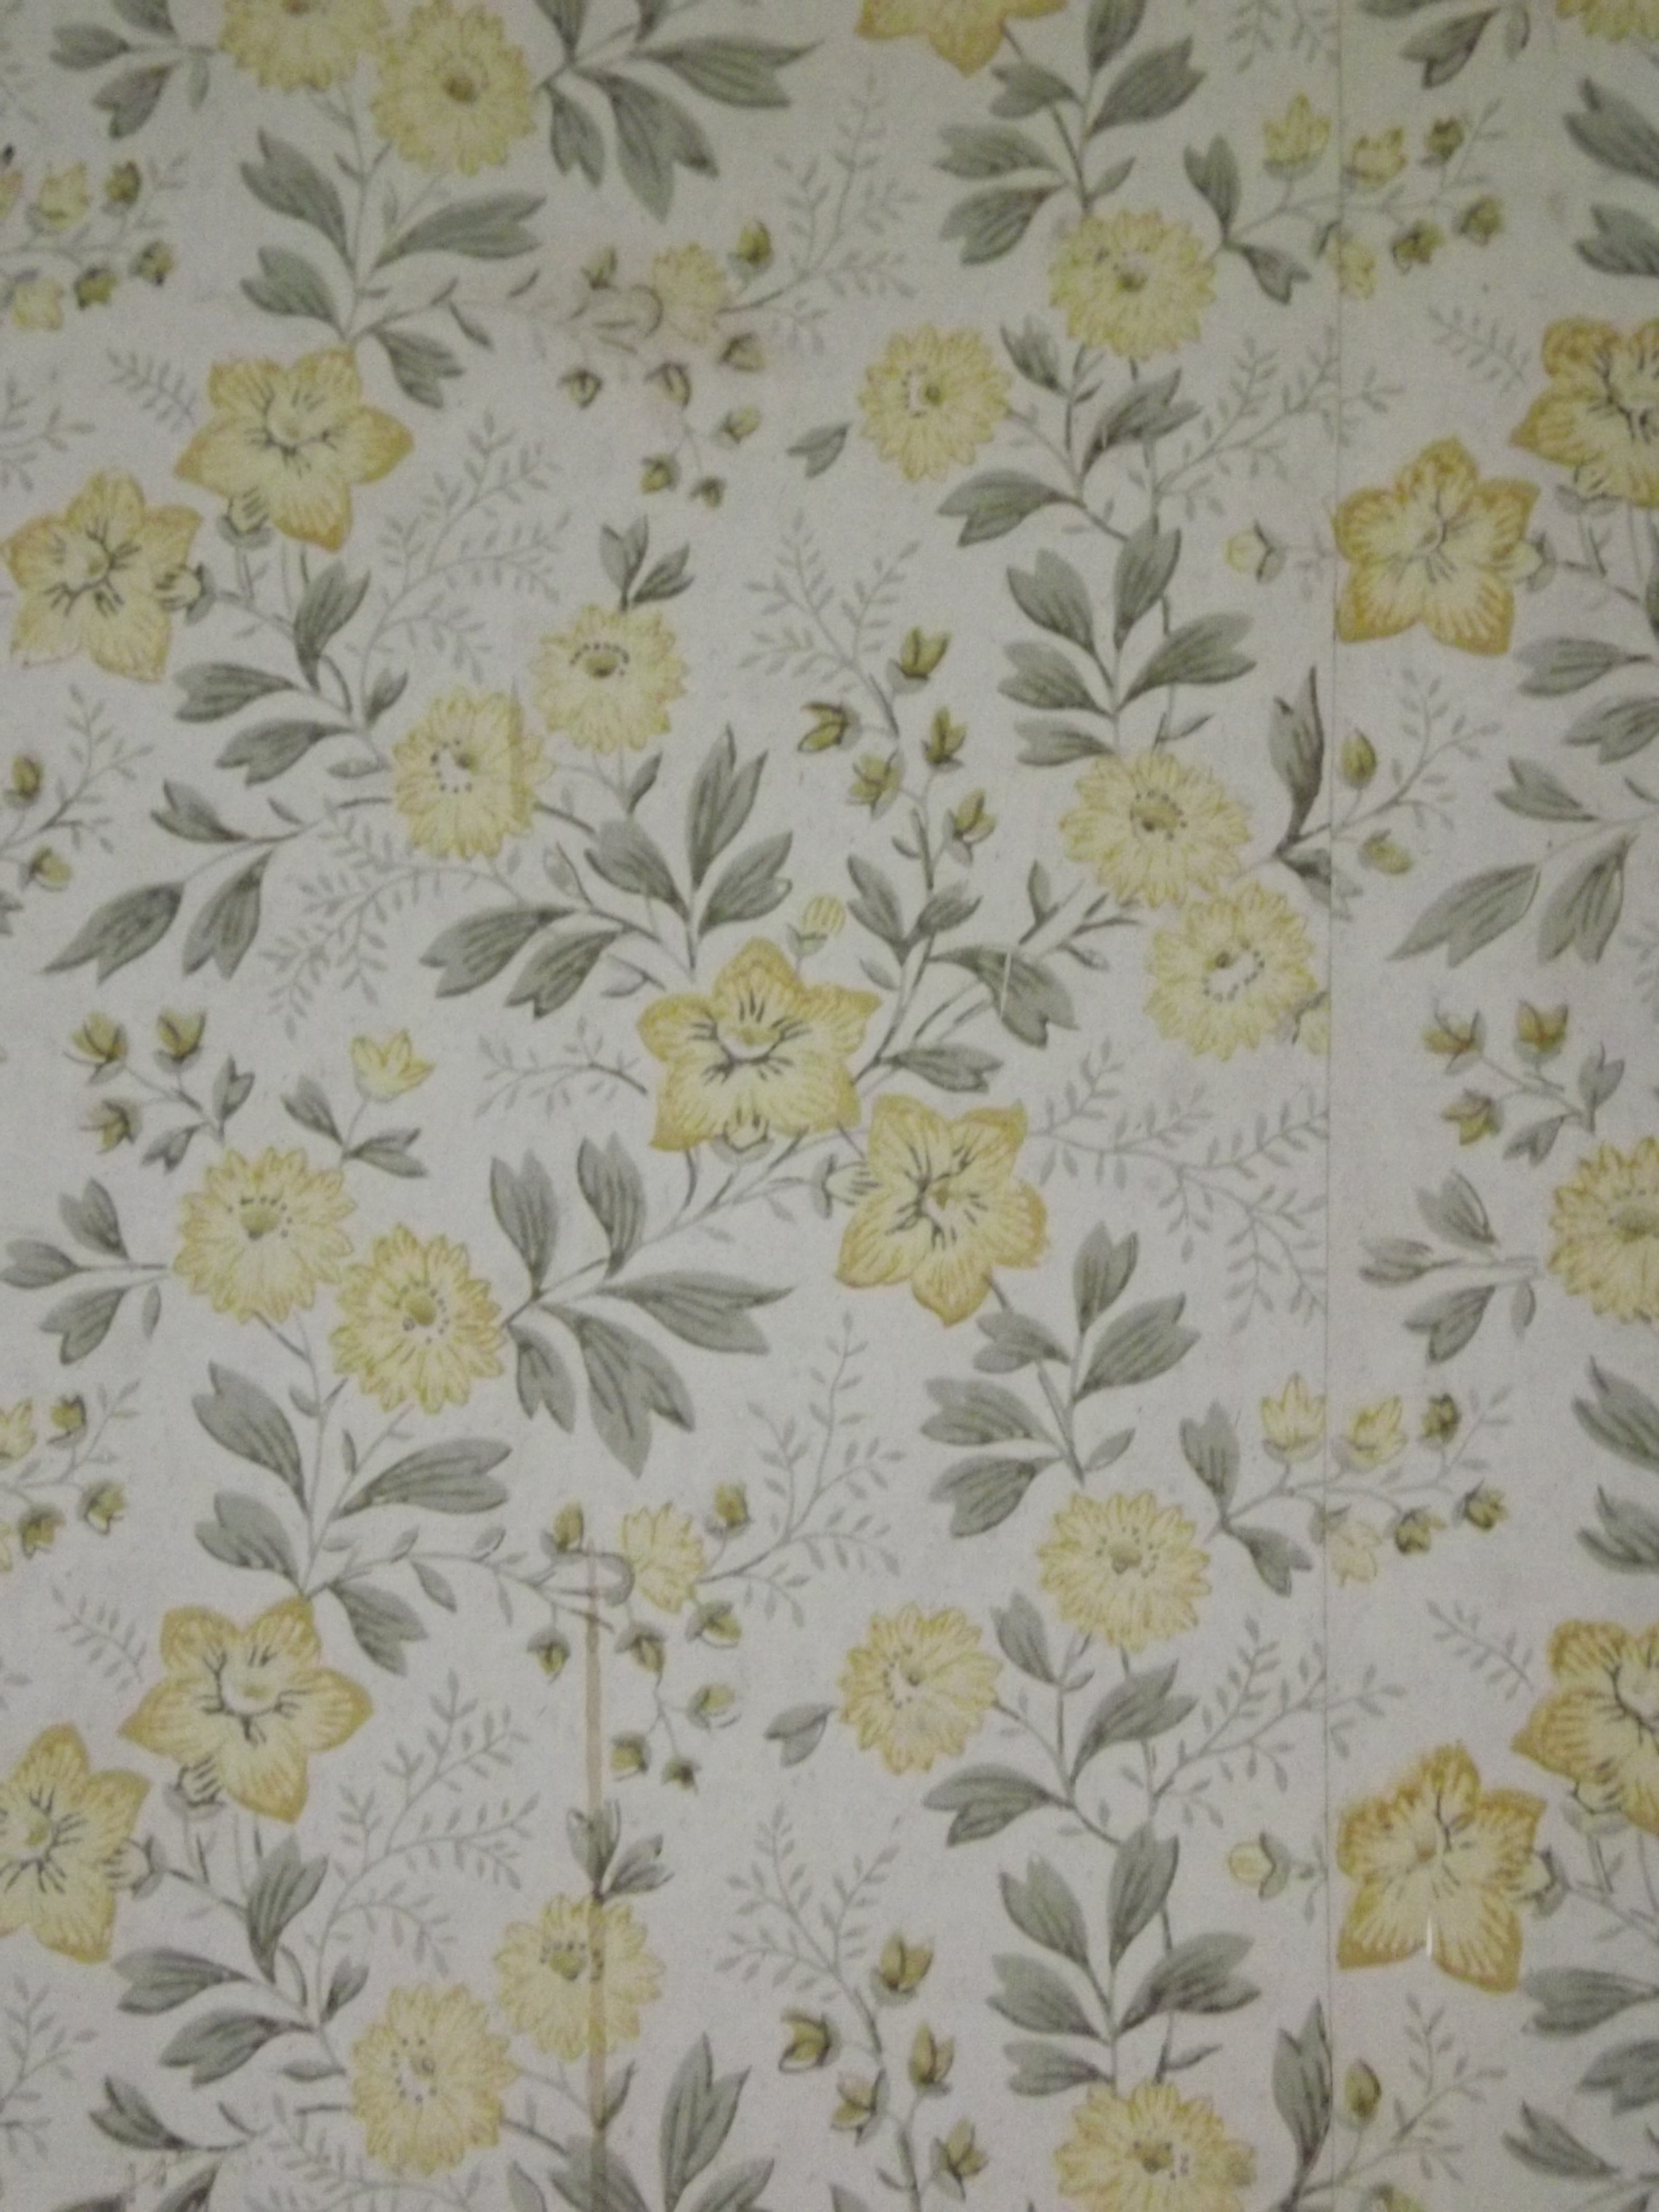
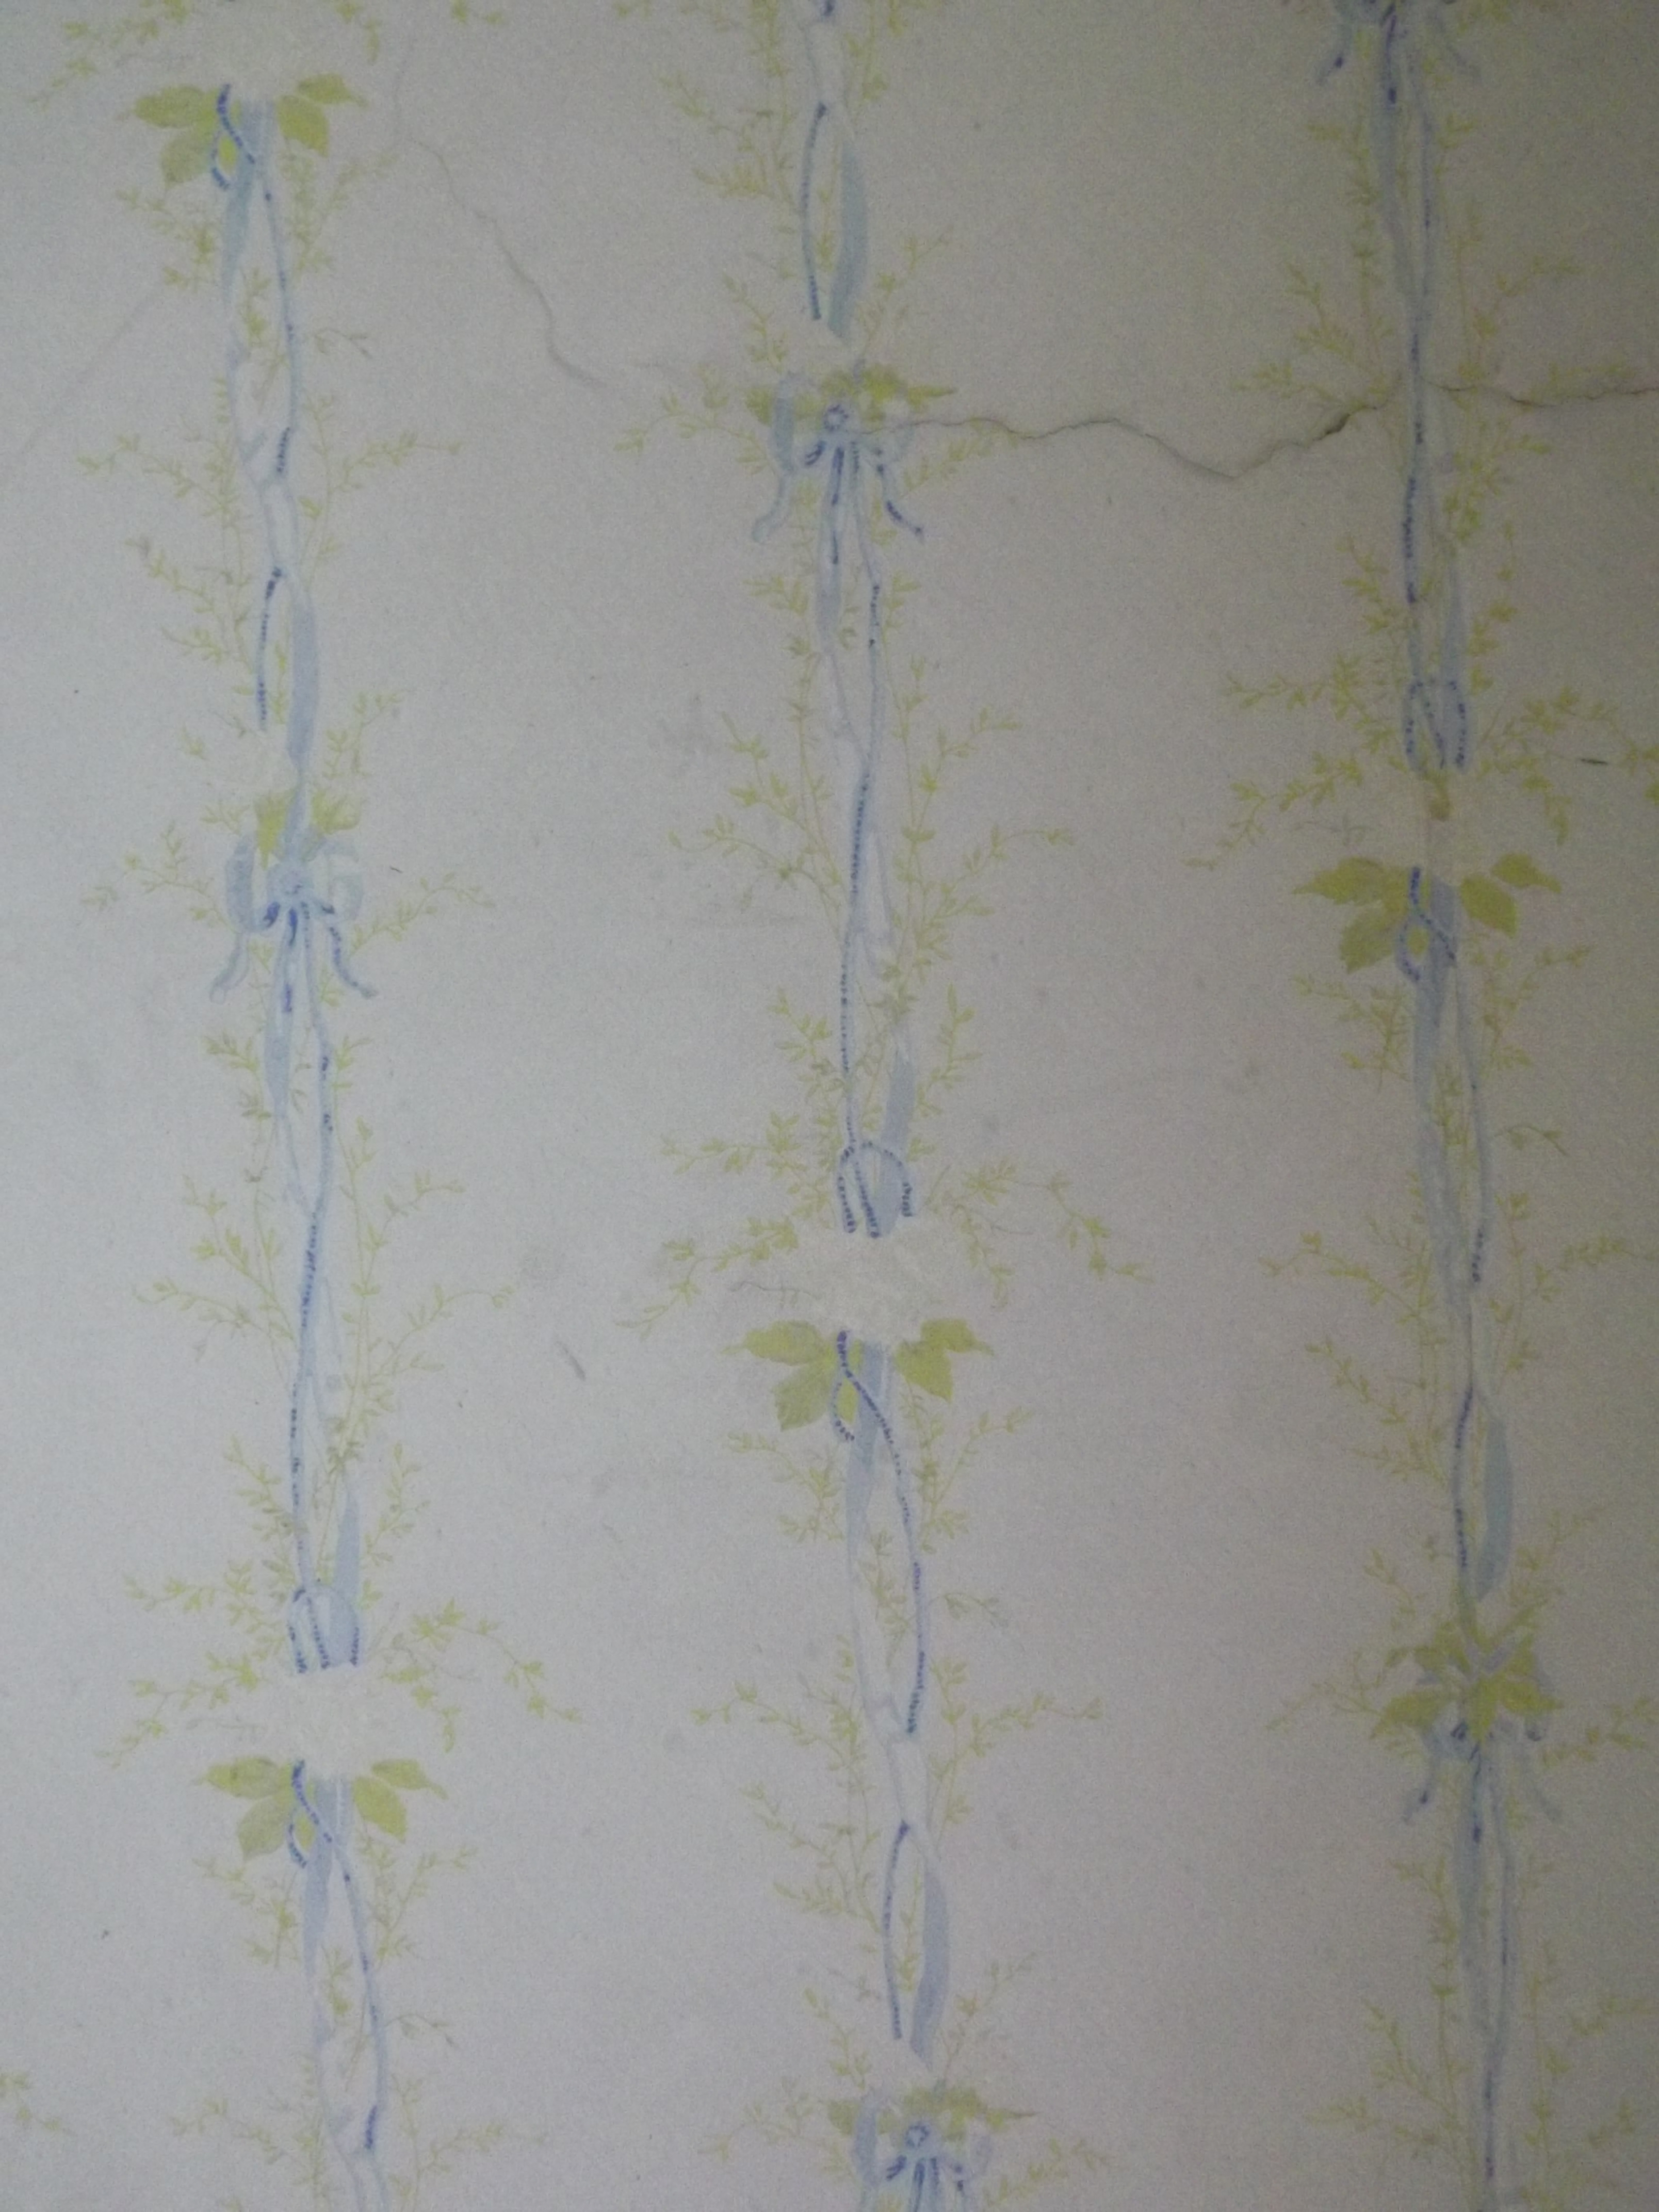
Today we went to Penrhyn Castle which is part of the National Trust, it was an incredible day. We got to look around the areas of the castle that weren’t open to the public and saw how this the family there would have lived. I was incredibly excited when I heard that there was wallpaper still on the walls because it was obviously going to be vintage wallpaper and I adore using these in my work.
Below I have included some images of the wallpaper that was found in ‘The Keep’, which is where the family would have lived when they didn’t have visitors in the castle.


The idea of going to the castle today was to incorporate elements of things we see and feel from the day within our packaging ideas and designs. At first I was very confused as to how to do this, however working my way through the castle and through the day I became very excited about working elements of the castle into my work.
Although I found The Keep incredibly interesting, I also found it very ghostly. There were pieces of furniture piled in corners of rooms, and you could imaging the family walking about the place. It was very odd to think of what each rooms may have been used for, for example, at the end of a corridor there was a tiny room with two windows in, and that was all, it was closed off by a heavy door and I still have no ideas what this room would have been used for. (in hindsight … it was a bathroom)
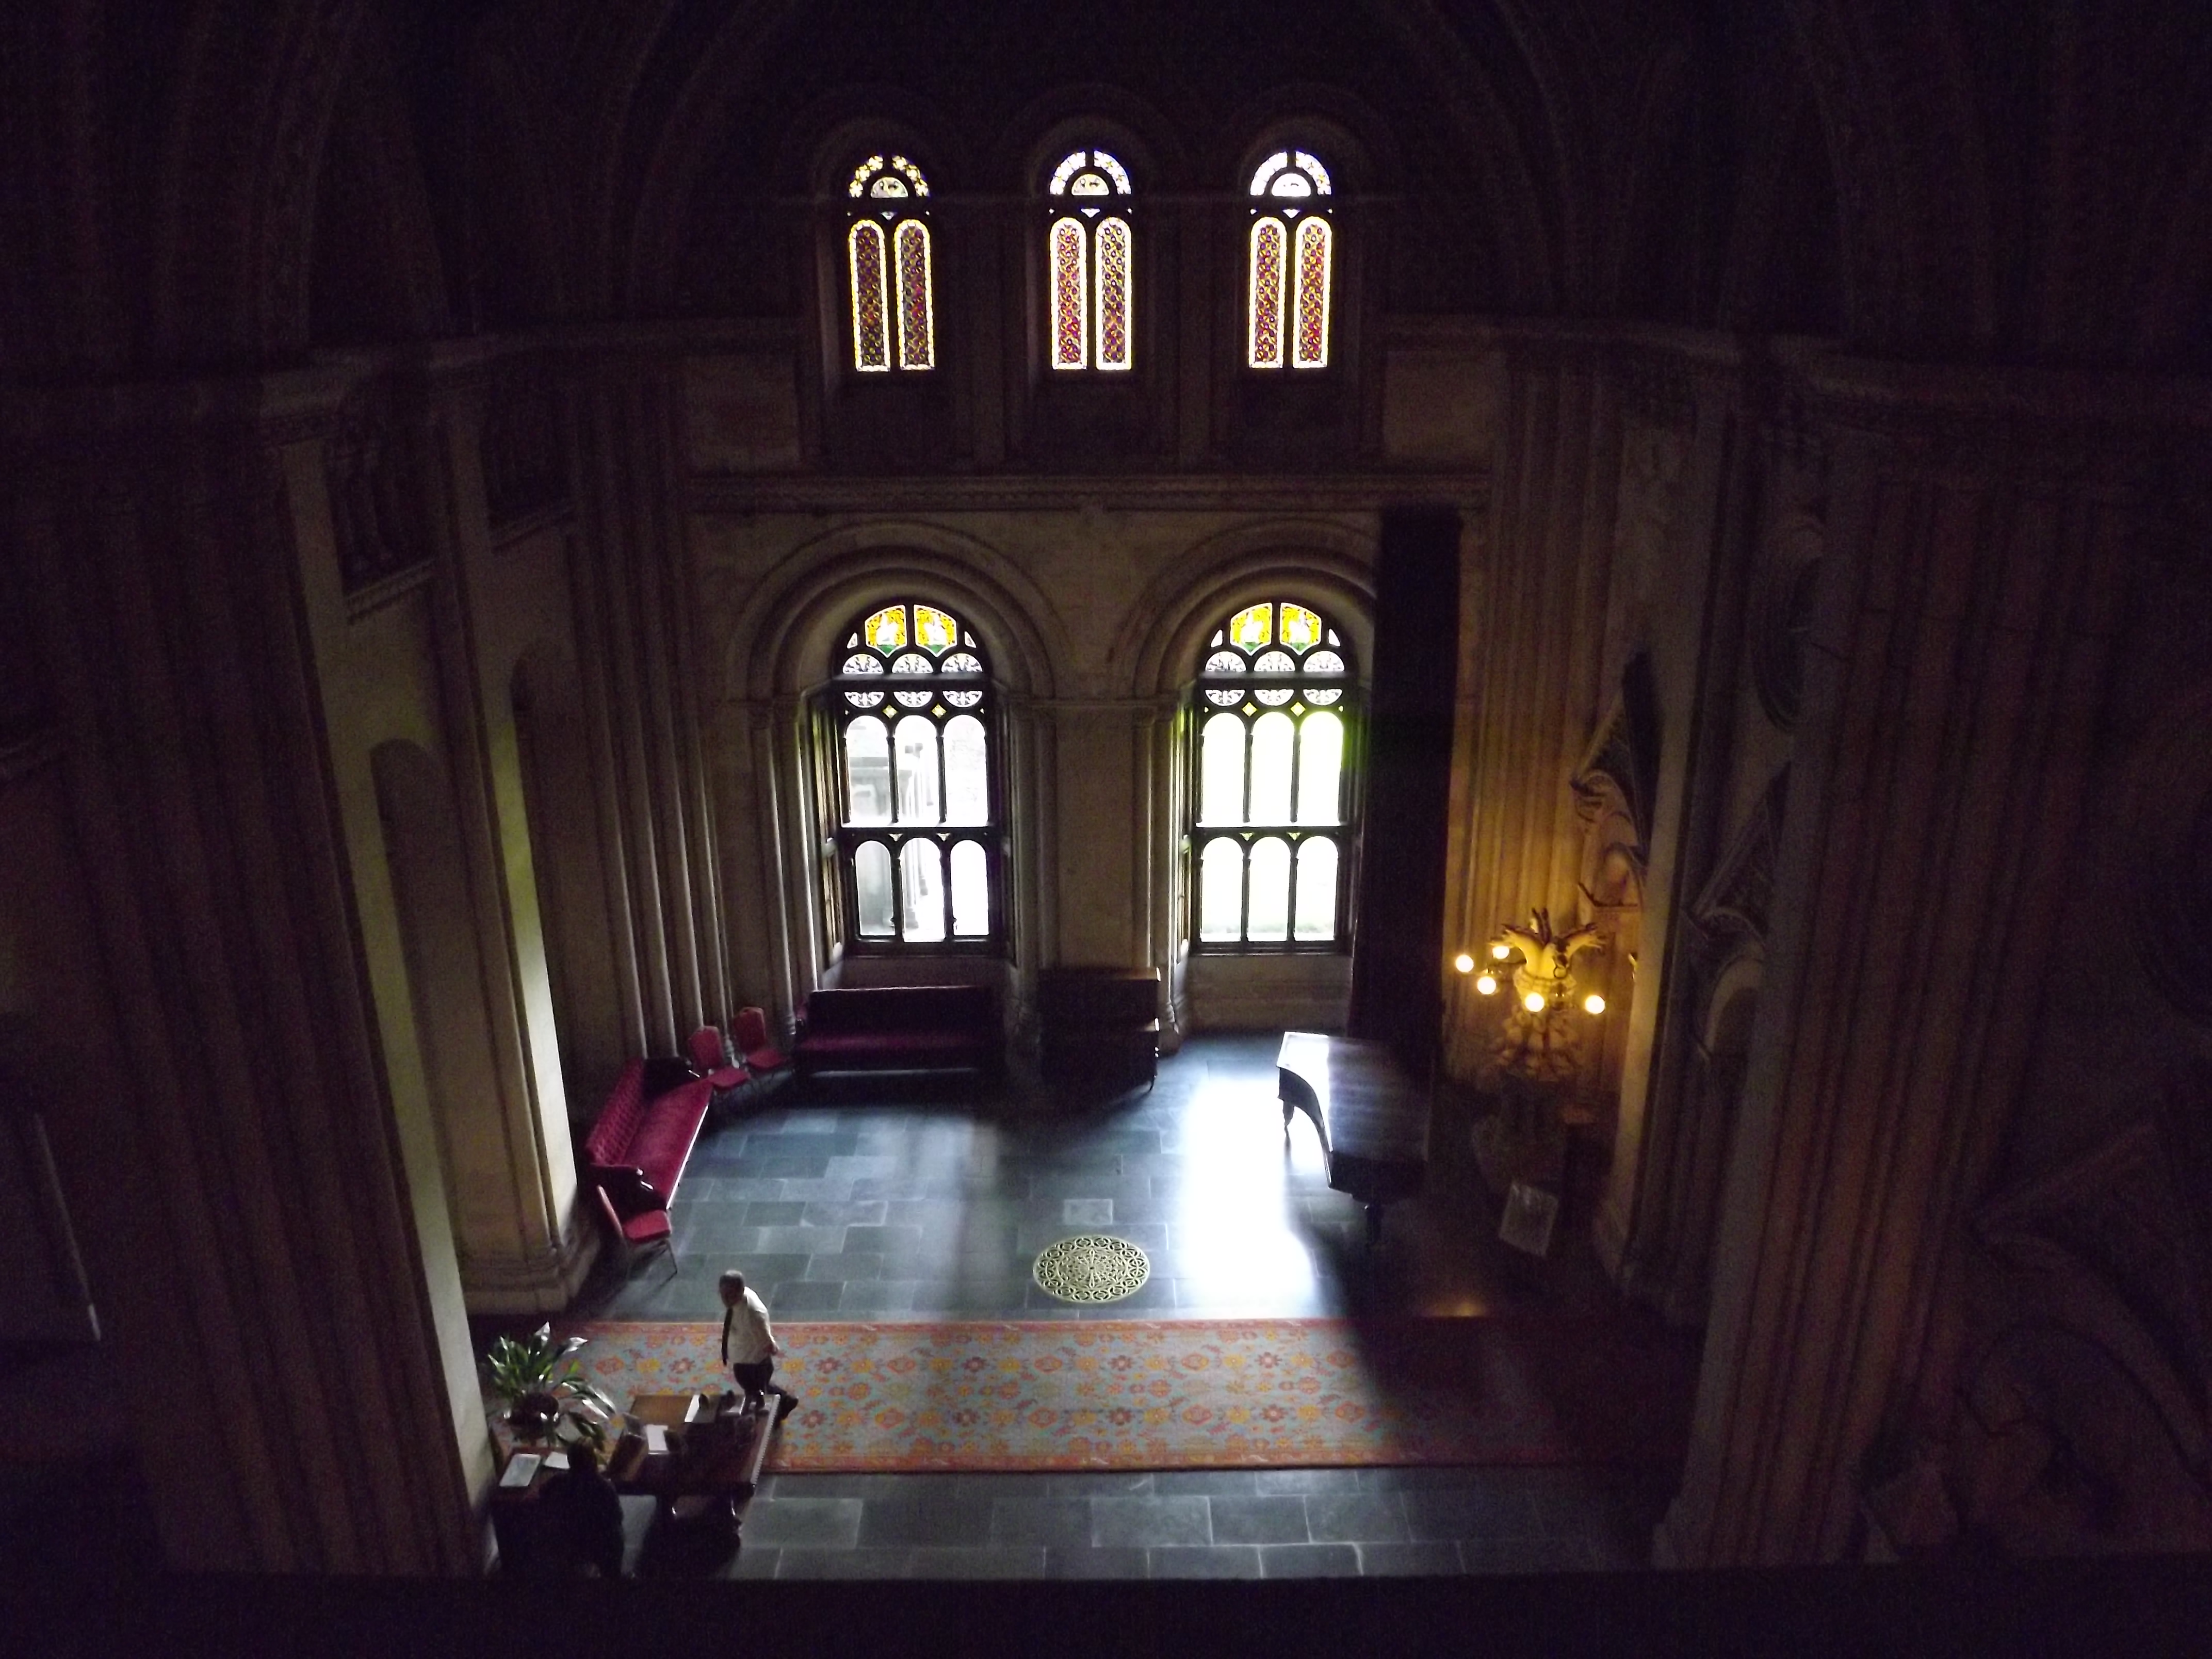
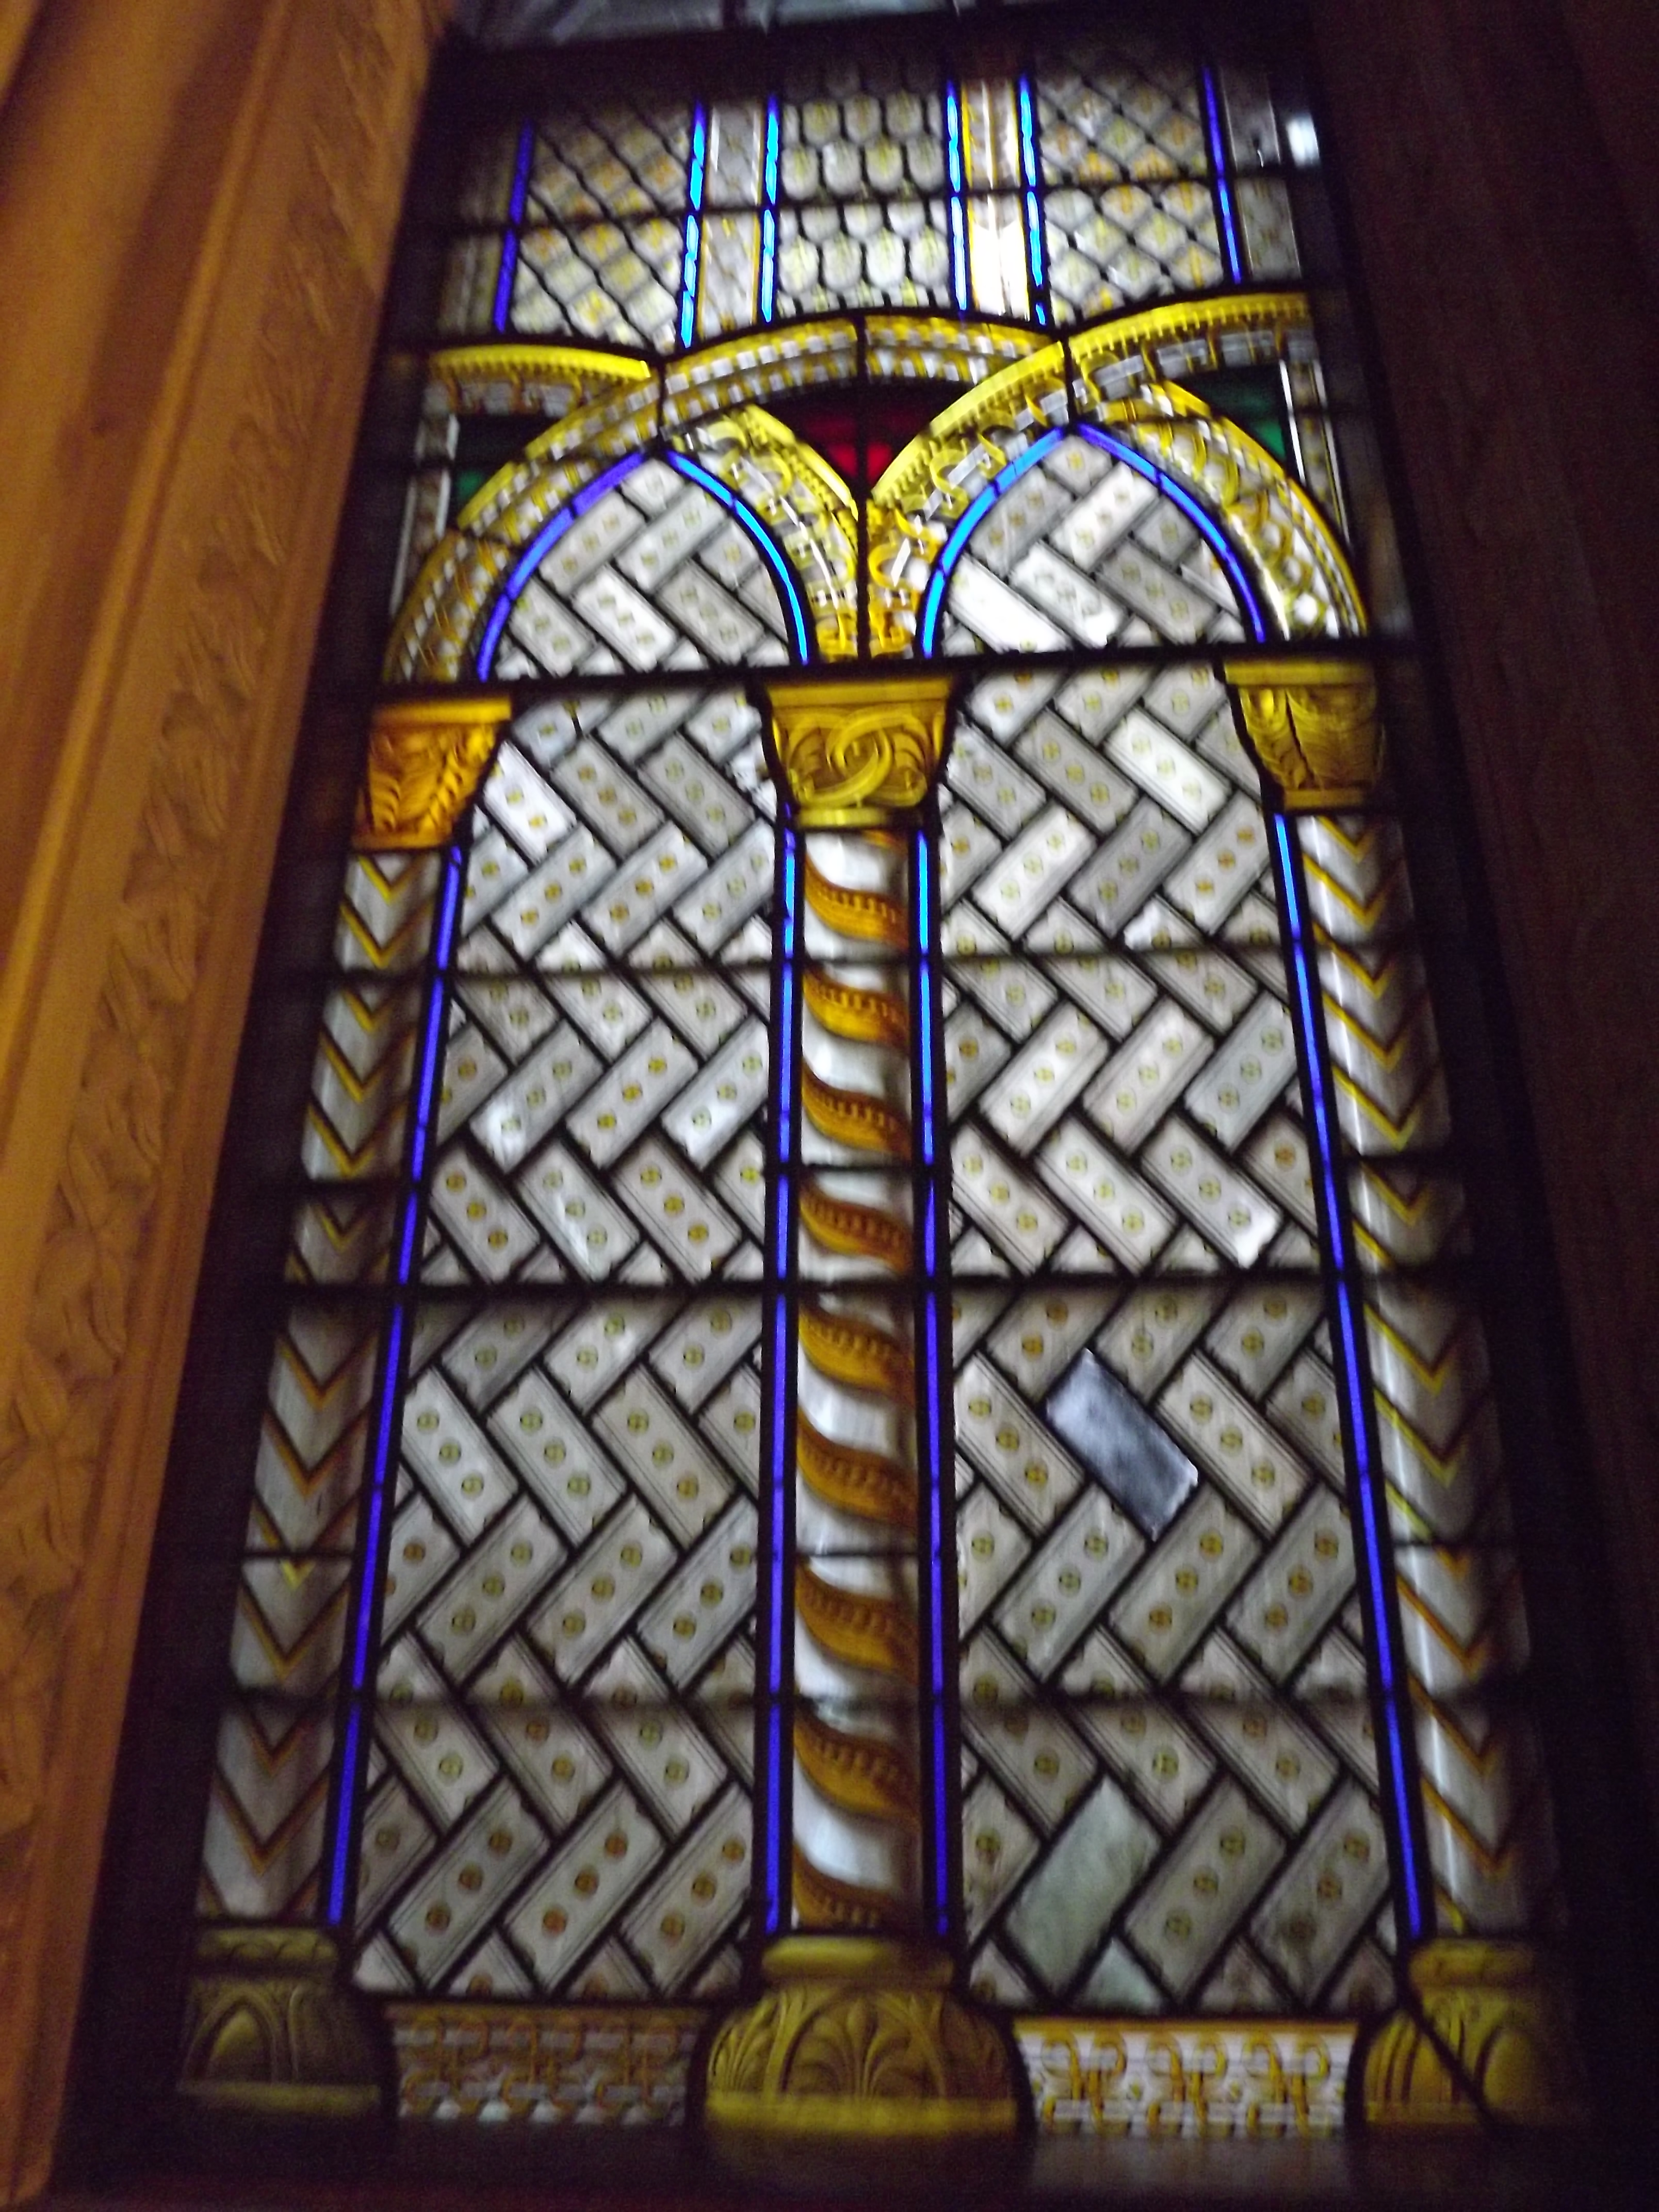
The ground floor of the castle was the most grand in my opinion. The Main Hallway was incredibly beautiful, with a grand piano, intricate lighting, incredible plaster work throughout the entire room and entire building. I was astonished to find out that the ceiling of the Main Hallway was false, and that the stained glass in the ceiling had tubes feeding light to it through the ceiling above, and that the entire thing was a wooden frame which was then plastered on top of. It was still incredible even if it wasn’t carved stone. The stained glass used throughout the castle was incredibly intricate, I adore the way the light feeds through the colours and it is a beautiful way of using the space for more art work and still letting light into the building.


Prier to coming to Penrhyn Castle my tutor had told me the story of Alice, so it was interesting to learn more about her from the guides throughout the castle. Alice Douglas Pennant was 18 years old she fell in love with the gardner, of corse her father disproved and sent her to her room to re-think her decision. This is where Alice scratched “Alice D. P” into the window, as well as a message “essere amato amando” which in Italian for, “to be loved whilst loving”.
We were told a story by one of the guides at the castle that whilst Alice was cataloguing the families painting collection in The Ebony Room, she was given a diamond ring by the Lord of the house, and she needed to prove that it was a real diamond and not a crystal or glass, so the image above is the window in The Ebony Room where Alice had scratched her name into the window. It was this ring that she then used to scratch her name and the message of love into her bedroom window.
I was devastated that I wasn’t able to go up to the window to see the encryption, the room was blocked off by a rope and was alarmed, so was no way I could sneak over! We were lucky enough for the guide in The Ebony Room to allow us over the barrier to get a close up view of the encryption there, I was incredibly excited to see it up close.
——————————————————————————————————————————————–
After walking around the castle a number of times and talking to the guides there, continuing with the brief, I really want to create a type of fabric doll based on Lady Alice. Although I am not a textile artist this is something that I really want to attempt for this brief. I want to dress the doll in a traditional dress to keep with the time period and also create the box that the doll will be presented in. I was to use one of the images of wallpaper that I took as the basis of the box, and use an archway as a window into the box to see the doll, and I want the doll to be called ‘Lady Alice’. I also want the typography to be similar to the way she has written her own name on the windows, so I will hand write it using a graphics tablet to try and match it as best I can. I am also toying with the idea of creating a gardner doll as well, so that they could finally be together in doll form at least.
——————————————————————————————————————————————–
So I’ve been looking on youtube for tutorials on how to create a “rag doll” because I’ve never even attempted anything like this before, so I’ve been researching various videos for it. I found a good example of shapes which I would need to make a particular doll, however I would need to alter the pattern for the doll slightly to make it fit the character of “Lady Alice” because she is a formal lady so the doll would need to look rather formal.
https://www.youtube.com/watch?v=FlgIyKKTy1E
The next video I looked for was how to add hair onto a doll because that is something I am dreading. To get a victorian hairstyle to look authentic on a doll, so I needed to research this a fair amount. I found a very informative video of a similar hair style that I would want. It is a centre parting, without a fringe and it is able to be styled which is what I would need for a Victorian hairstyle.
https://www.youtube.com/watch?v=j4VgS2IUMYw
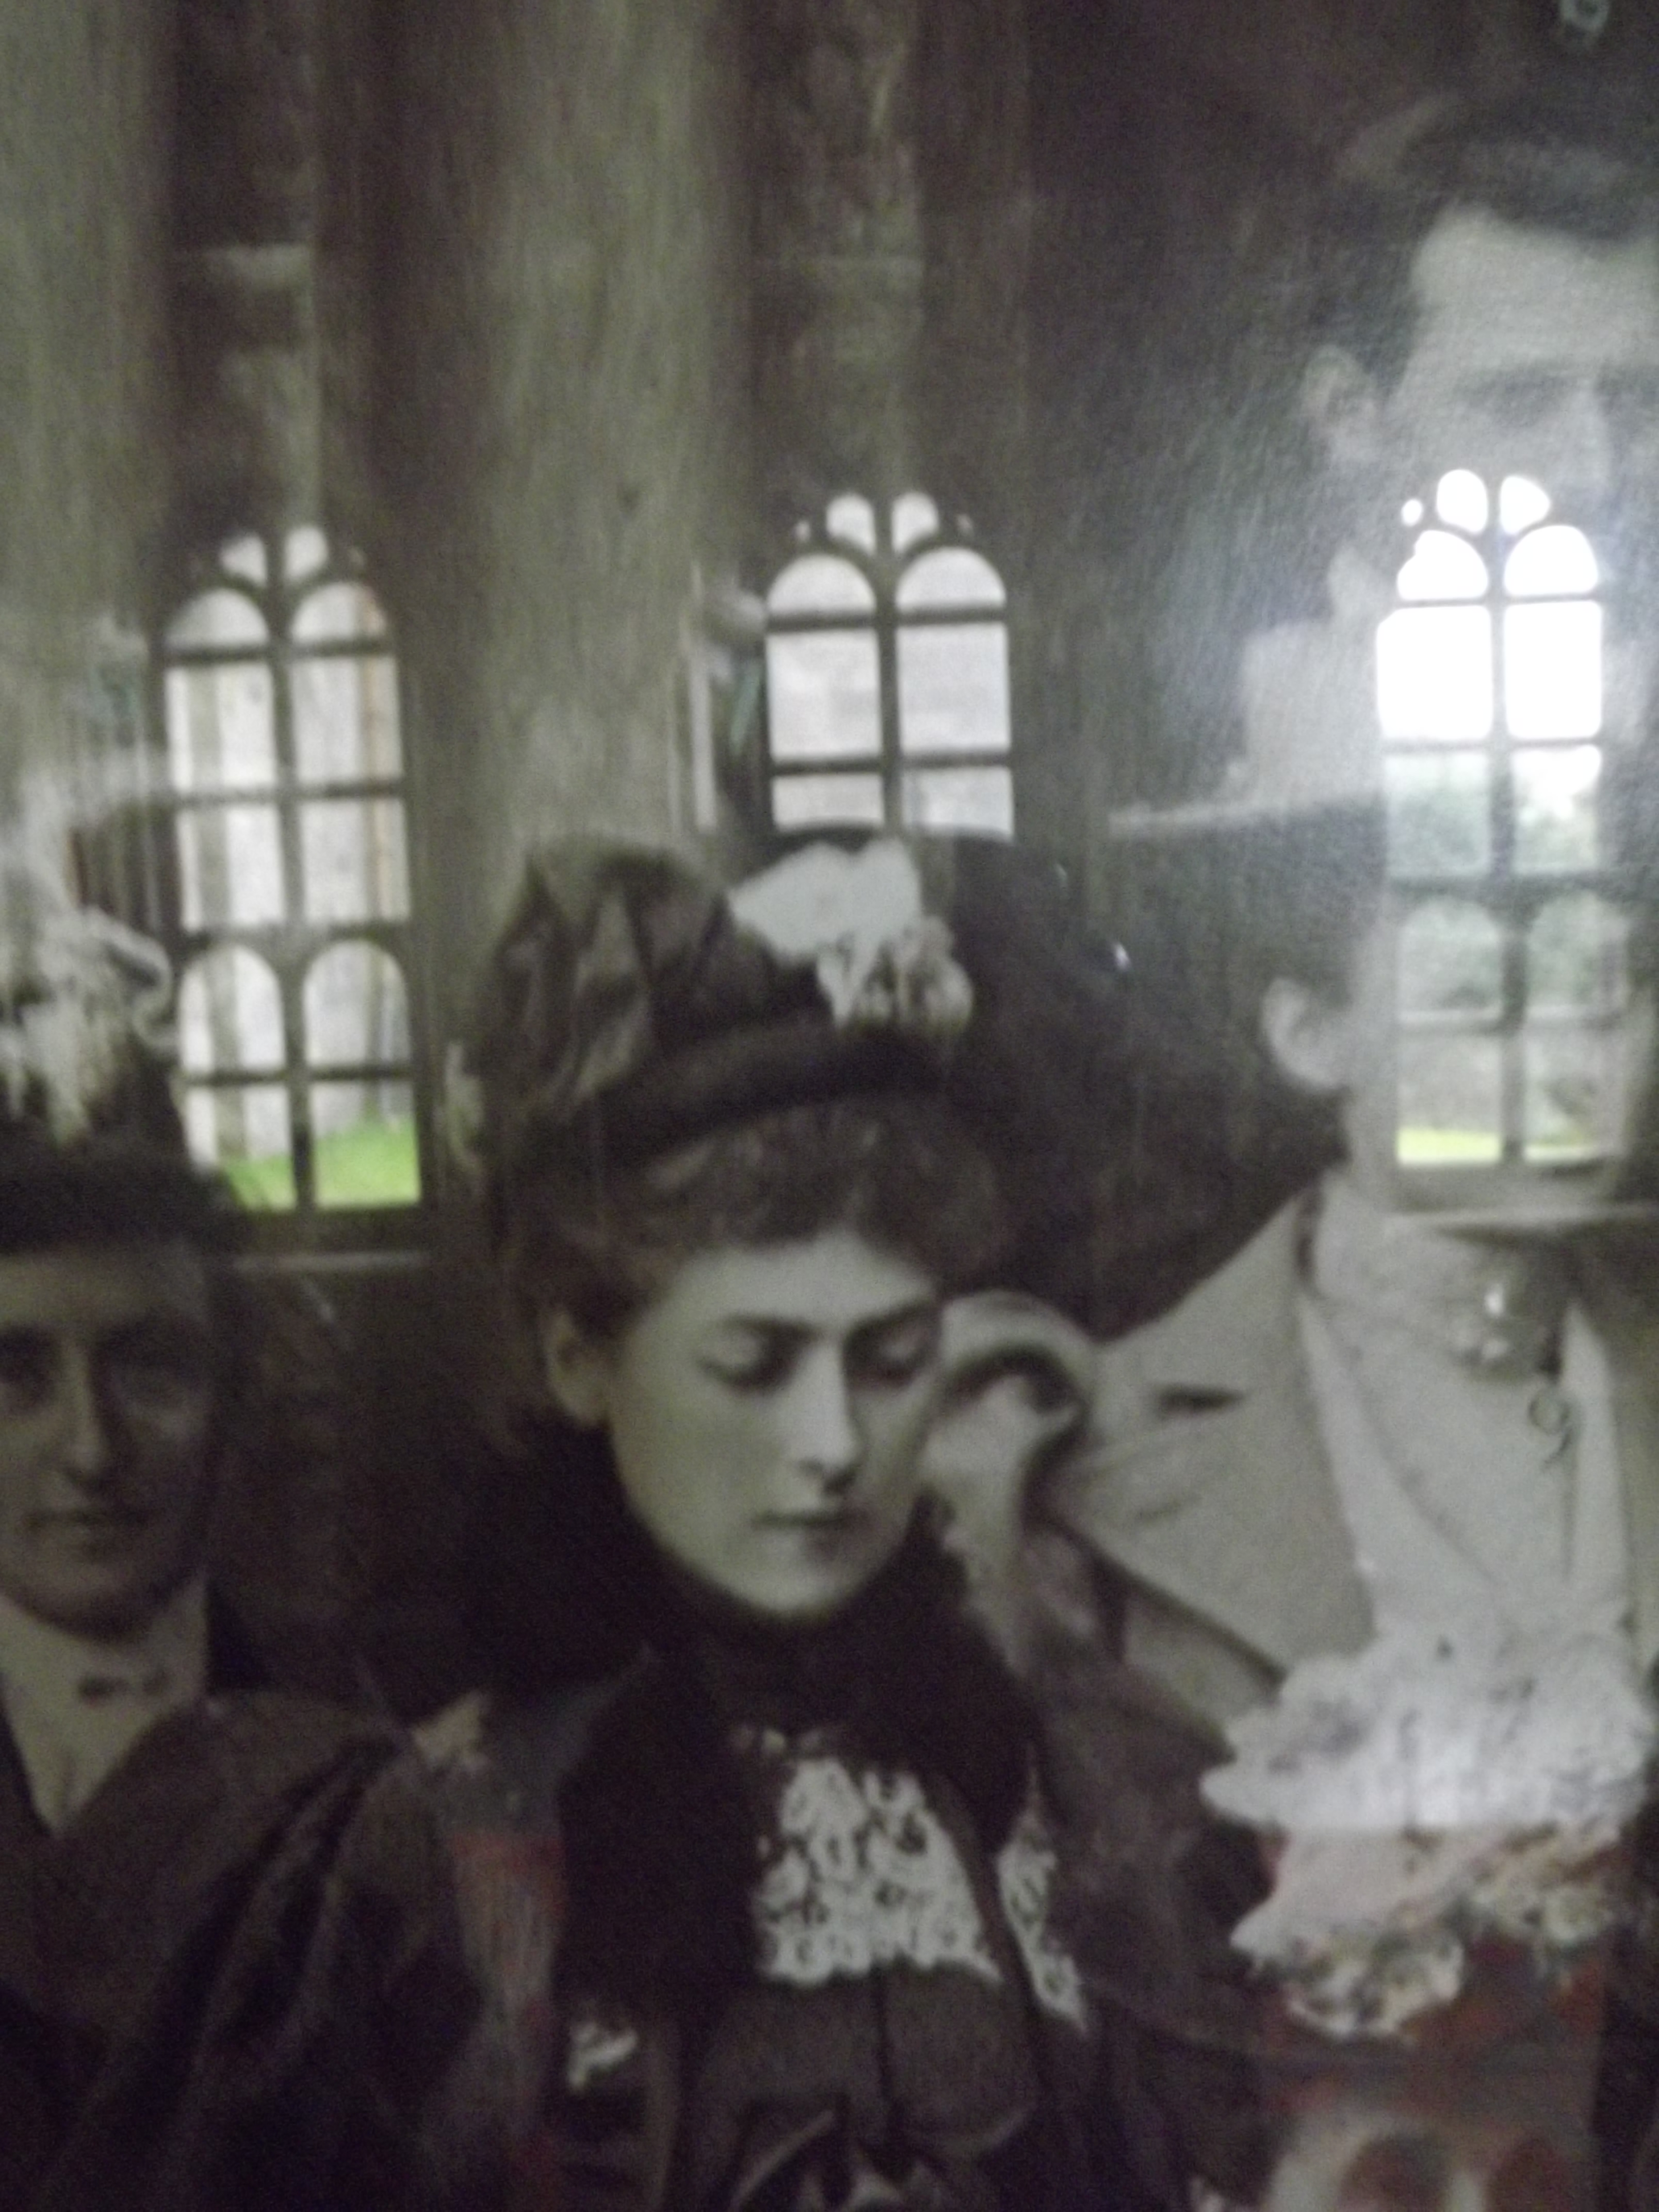
 So I was researching Lady Alice Douglas Pennant to try and find more information about her and I came across an article about the story of her scratching a message into her bedroom window, so I didn’t find any new information, but I did find an image of the scratched message and this portrait of Lady Alice which I was rather excited about.
Finding this image of her has given me an insight into what she would wear around the time that she had scratched the message into the window which has given me a reference to work with for the type of dress that I put on the “rag doll” version of Lady Alice that I make.
I intend on doing a broad search of Victorian Dresses from around 1880, and finding similar dresses to the one in this image, I then want to look for tutorials for creating these style of dresses, even if the tutorials are for wearable dresses, I would still be able to scale it down to fit the doll, and it would give me an insight into how to create the layers and ruffles e.t.c.
——————————————————————————————————————————————–

After doing a broad search for Victorian dresses these are a few of the ones that I’d found.
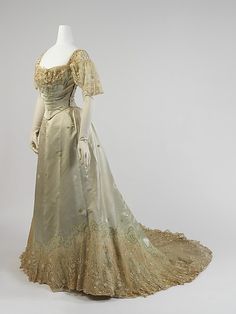
The first comes from a vintage textile website (http://www.vintagetextile.com/new_page_35.htm) and on this website it states that the dress is for sale and is originally from 1895. It shows various images of the details of the bust e.t.c and is similar to one that I want to create for the rag doll.
The second image came from ‘Pintrest’ which is another image blogging website, so I want able to find an original source for it, however I adore this dress. I find the bust to be very flattering along with the length of the sleeves, the V shape at the front of the dress is very flattering on the female figure and the overall two-tone of the dress and the length are all beautiful details. (http://www.pinterest.com/pin/447123069224837594/)
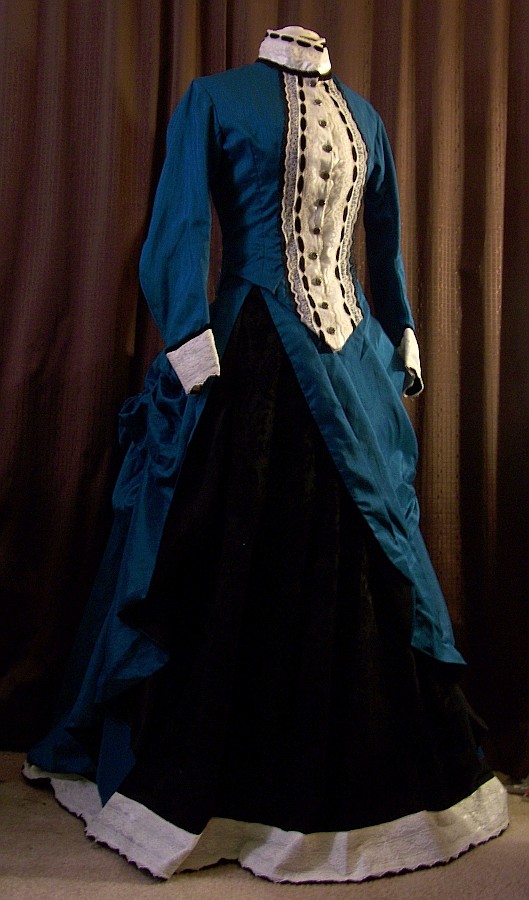
The teal dress was sold on Etsy in 2010, I adore the more formal style to this dress with the lace running down the centre. I think the colour is incredibly striking and beautiful and accompanied with the cream collar, cuffs and under skirt it looks a very elegant dress. I don’t however think that I will be using this colour dress on the rag doll that I intend to make, I think that the more neutral shades would be better suited because in the photograph of Lady Alice the dress that she is wearing doesn’t look particularly dark or bold, and I think it would be a more neutral, pale tone.
(https://www.etsy.com/uk/listing/40796485/teal-1880s-victorian-bustle-dress)
——————————————————————————————————————————————–

YAY! I have just found a PDF file that has an amazing fabric doll template,
http://www.judisdolls.com/manikin.pdf
I found it by looking at rag dolls on Pintrest, found an image of the type of doll I wanted to create which took me to this website,
http://www.judisdolls.com/bleuettemanikin.html
which intern took me to the PDF file! It is the best and most realistic template that I’ve found so far so hopefully, the doll turns out really well!
——————————————————————————————————————————————–


Friday 17th Novemeber
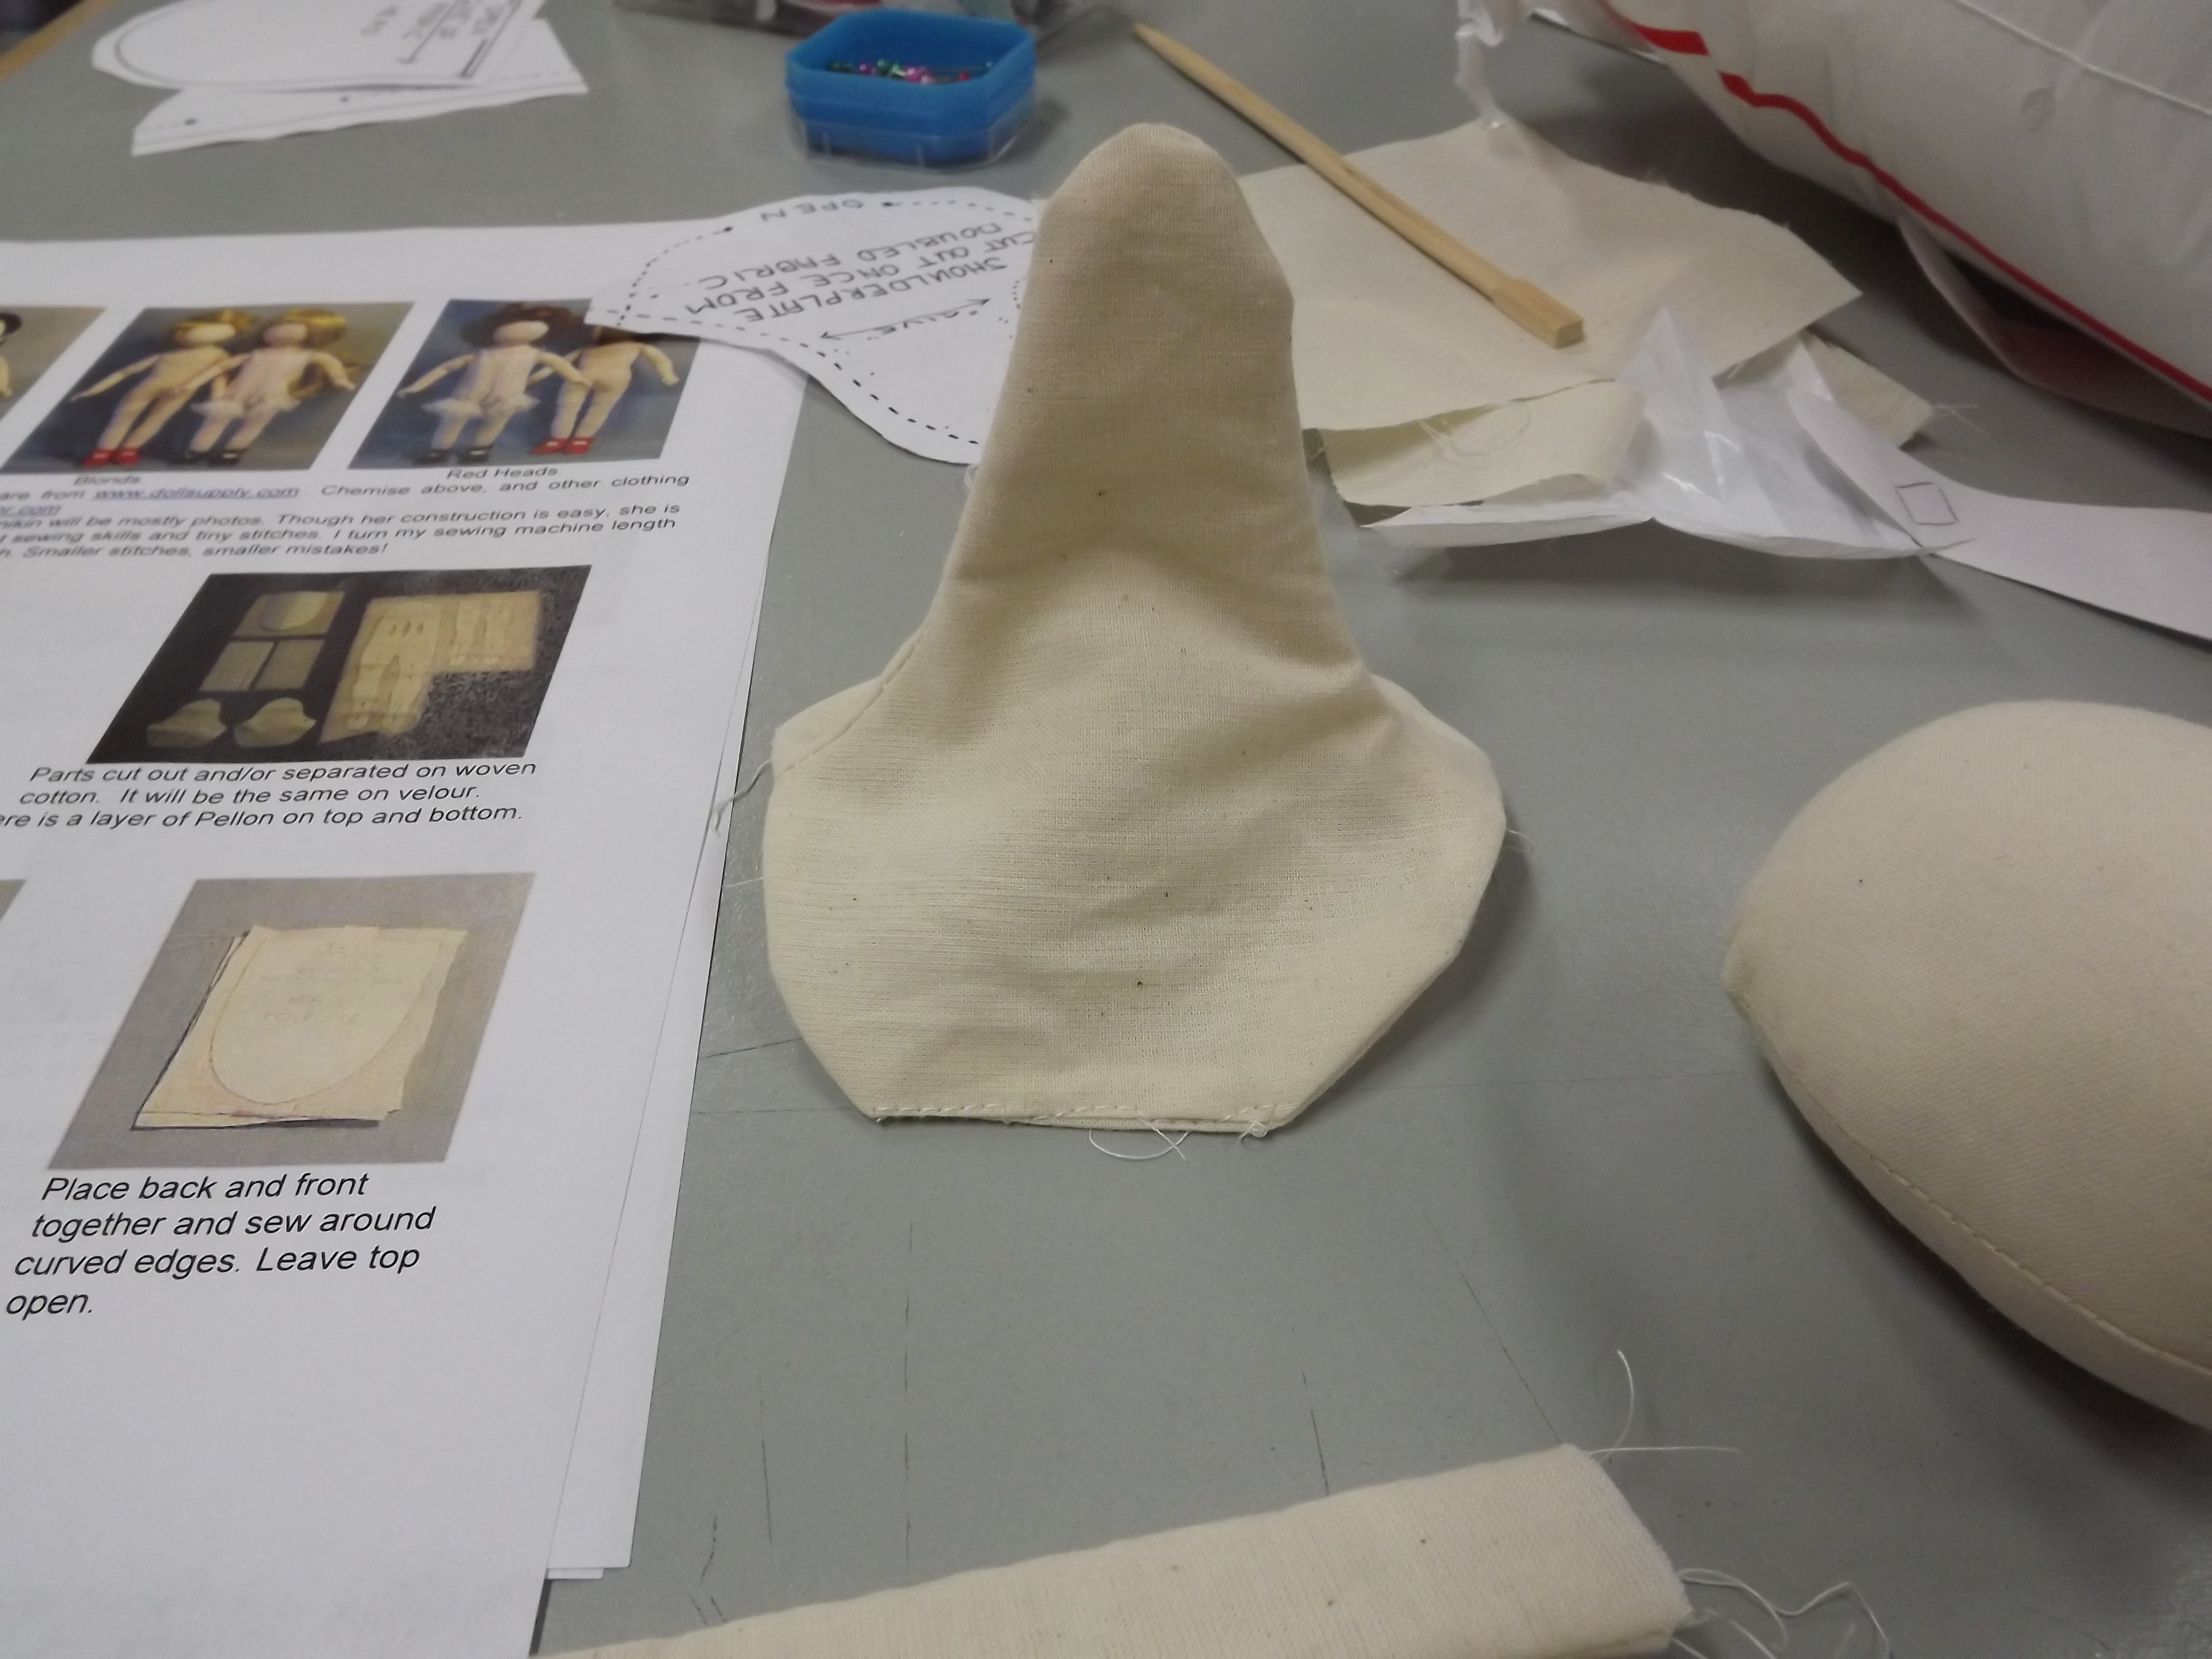
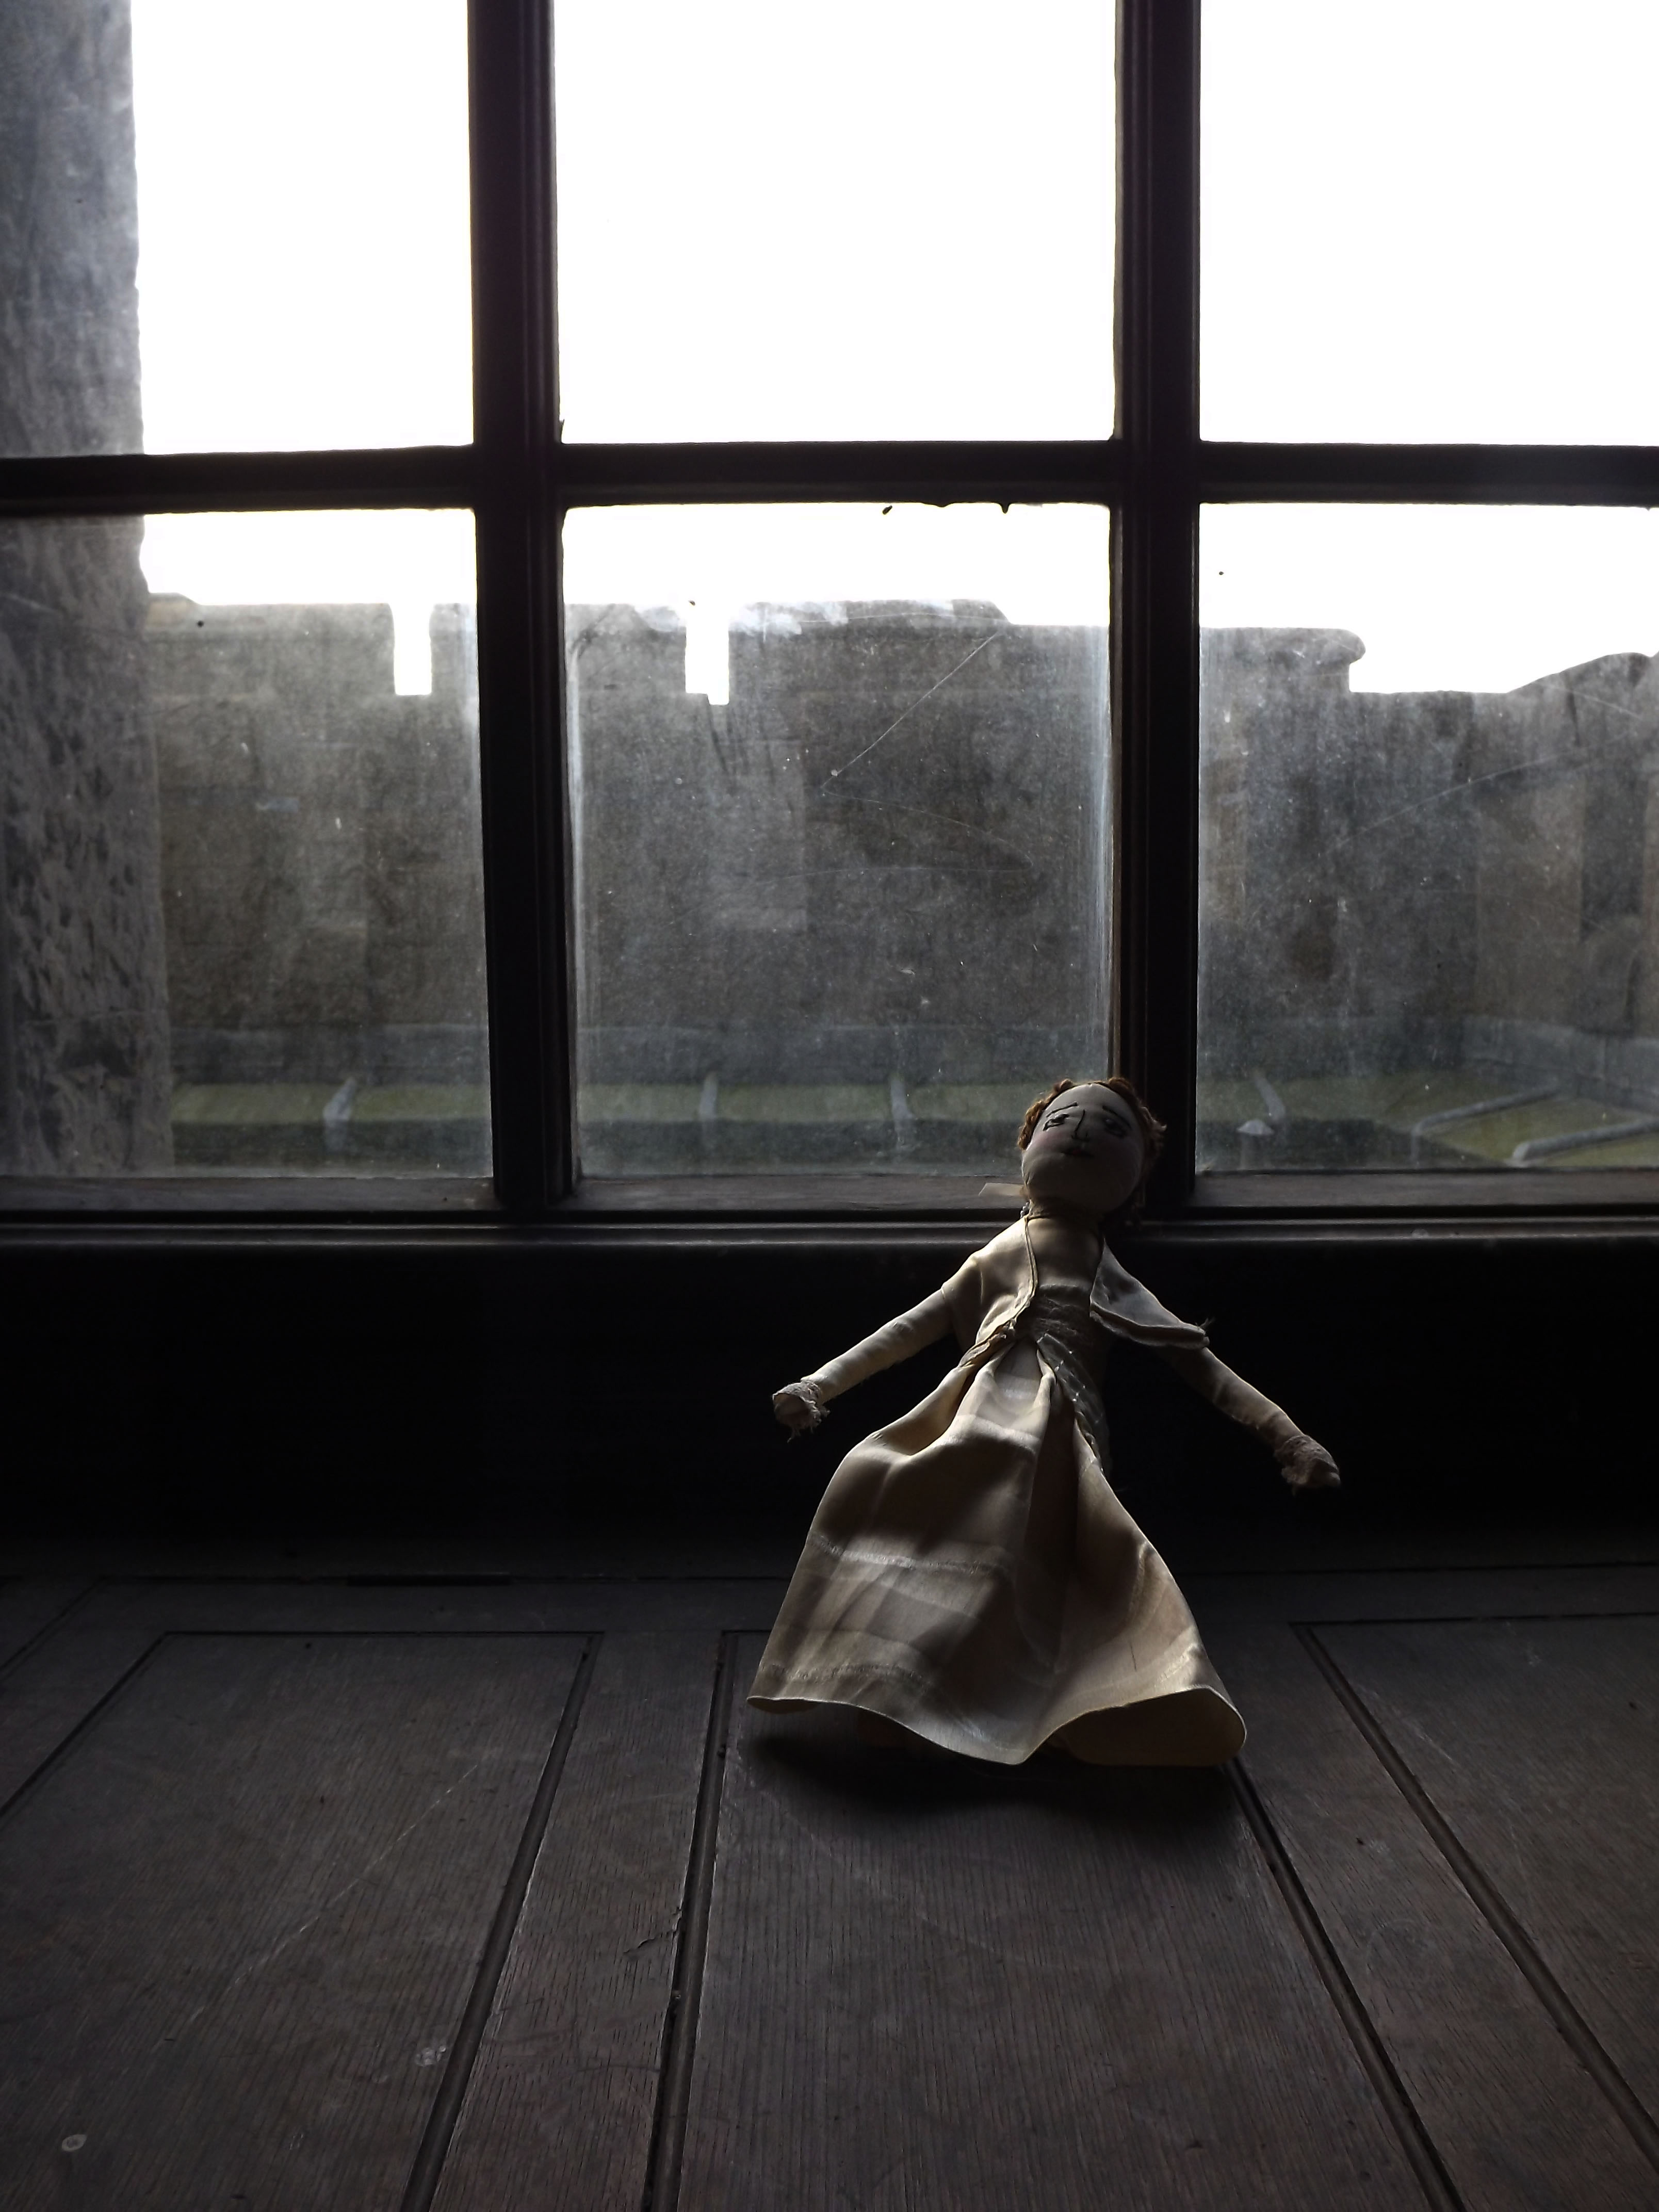
I came in in the morning ready for a student rep meeting in the afternoon, however I then ended up staying all day. I wanted to get this rag doll finished today, well the body at least, and I am very happy that I managed it in one day. Sue was there, a student that was on my course from last year, she is a textiles artist and was a great help with making the doll, she said that she had made various ones before so knew what should be done.
I began my work by enlarging the copy of the pattern that I had to A3, because I knew what size I wanted the doll to be and A3 would accommodate that. Once I’d done that I needed to alter the pattern slightly, I wanted the waste of the doll to go in more profoundly, as though she were wearing a corset, so I altered that and then pinned the patterns to the fabric and cut them out.
Once I had everything cut out I then sewed the seams together to create each element. Sue gave me a handy tool! it was a chop stick! and it was incredibly useful to turn the fabrics the right way out, especially with the legs and the arms where the fabric was long and thin.
Once I had everything finished, I then began to stuff the doll. The amount of stuffing I used was incredible! however, I did over prepare, I bought two bags and ended up using half of one! Although I do plan on making more dolls in the future so it wont go to waste. Once everything was stuffed, I needed to pin everything together and to then hand sew them on, making sure that the hands were on the right way around and that everything looked as it should.
I was very happy with my completed doll. I have never done anything like this at all so I was very pleased with the outcome. I managed to use a sewing machine well enough and although I thought that I’d gone wrong a little, you couldn’t really tell. Although she did have one leg longer than the other, but lets just keep that between us.
——————————————————————————————————————————————–


——————————————————————————————————————————————–
Today I started work on the box to encase the doll.

I used a template from the box of a doll that I had bought from a pound shop, and because the photo copier wouldn’t work I needed to hand draw the template and then enlarge it to fit the doll that I have made.
I think that I am going to have a hand made box, instead of having a computerised box, I want to hand make the box and then add the wallpaper , possible image-maker the wallpaper onto the box, and then I may sew into the box to add texture and hand write information onto the back. I want to include the story of Alice and the Gardener so that people understand the meaning behind the doll e.t.c.
——————————————————————————————————————————————–


Upon finishing the Packaging Brief I am able to reflect upon the project. Overall I am happy with the result of this project.I had never made a doll before and surprised myself with my sewing skill. I am very happy with the doll, even though her dress didn’t turn out as well as I’d hoped, but I think that that was because of the type of material that I had chosen. The fabric for the bulk of the dress frayed very easily, so the fabric choice would be something that I would change if I could restart.
I am happy with the overall look of the box, however I wasn’t accurate with the measurements so there aren’t flaps which fold into the box to keep it shut so I have to tape the box closed which isn’t ideal. I had to hand draw the template of the box to enlarge it enough for the size of the doll, and i obviously didn’t take enough care when measuring (even though I thought I did).
I find the rough texture of the box interesting, and like how it relates to The Keep within Penrhyn Castle because of how run down and unkept it was. I would now however, scan/photograph the box and print it out as a solid image rather than having the raw layers of the Image Maker visible because I feel that it would be more professional.
I also think that if I were to begin this project again, I would make the doll much smaller. The size of the doll had caused me problems such as the size of the box and making the dress. I feel that if the doll was smaller that this project may have run smoother.
